Kids’ 4th of July Crafts and….FREE PRINTABLES
 In a former life, I used to love crafts. One of my FAVORITE things to do as a kid was visit either of my grandmothers and raid their sewing rooms. Both my dad’s mom (Nana) and my mom’s mom (Memaw) had sewing/craft rooms filled with anything and everything I wanted to innovate a spectacular sock bunny, an embroidered pillow, baby doll quilts, chalk drawings, wooden paintings of koala bears holding a “no smoking please” sign (this is still hanging on my Nana’s front door…apparently she had a lot of smoking visitors back in the day LOL), etc. But alas, I grew up and adulting beat the creativity out of me with a stick modge-podged with meeting and deadline requests. And then…I had kids. And then…they became school-aged. And then….the schools began sending home requests to “craft” with our kids, everything from 100 items glued onto a piece of construction paper to celebrate 100 days of school, to elaborate Valentine’s Day card boxes. And I’m not gonna lie…I kinda loved it! It awoke my inner creative spirit. But I also kinda didn’t have time for it. So, over the last two years or so, I’ve worked hard to strike a happy medium and work with my kids on these projects, help them make something they’re proud of, while not creating an over-the-top set of expectations that leads to multiple emotional breakdowns. If you follow me on Insta, you know I’m a huge proponent and sharer of parenting memes, including this one:
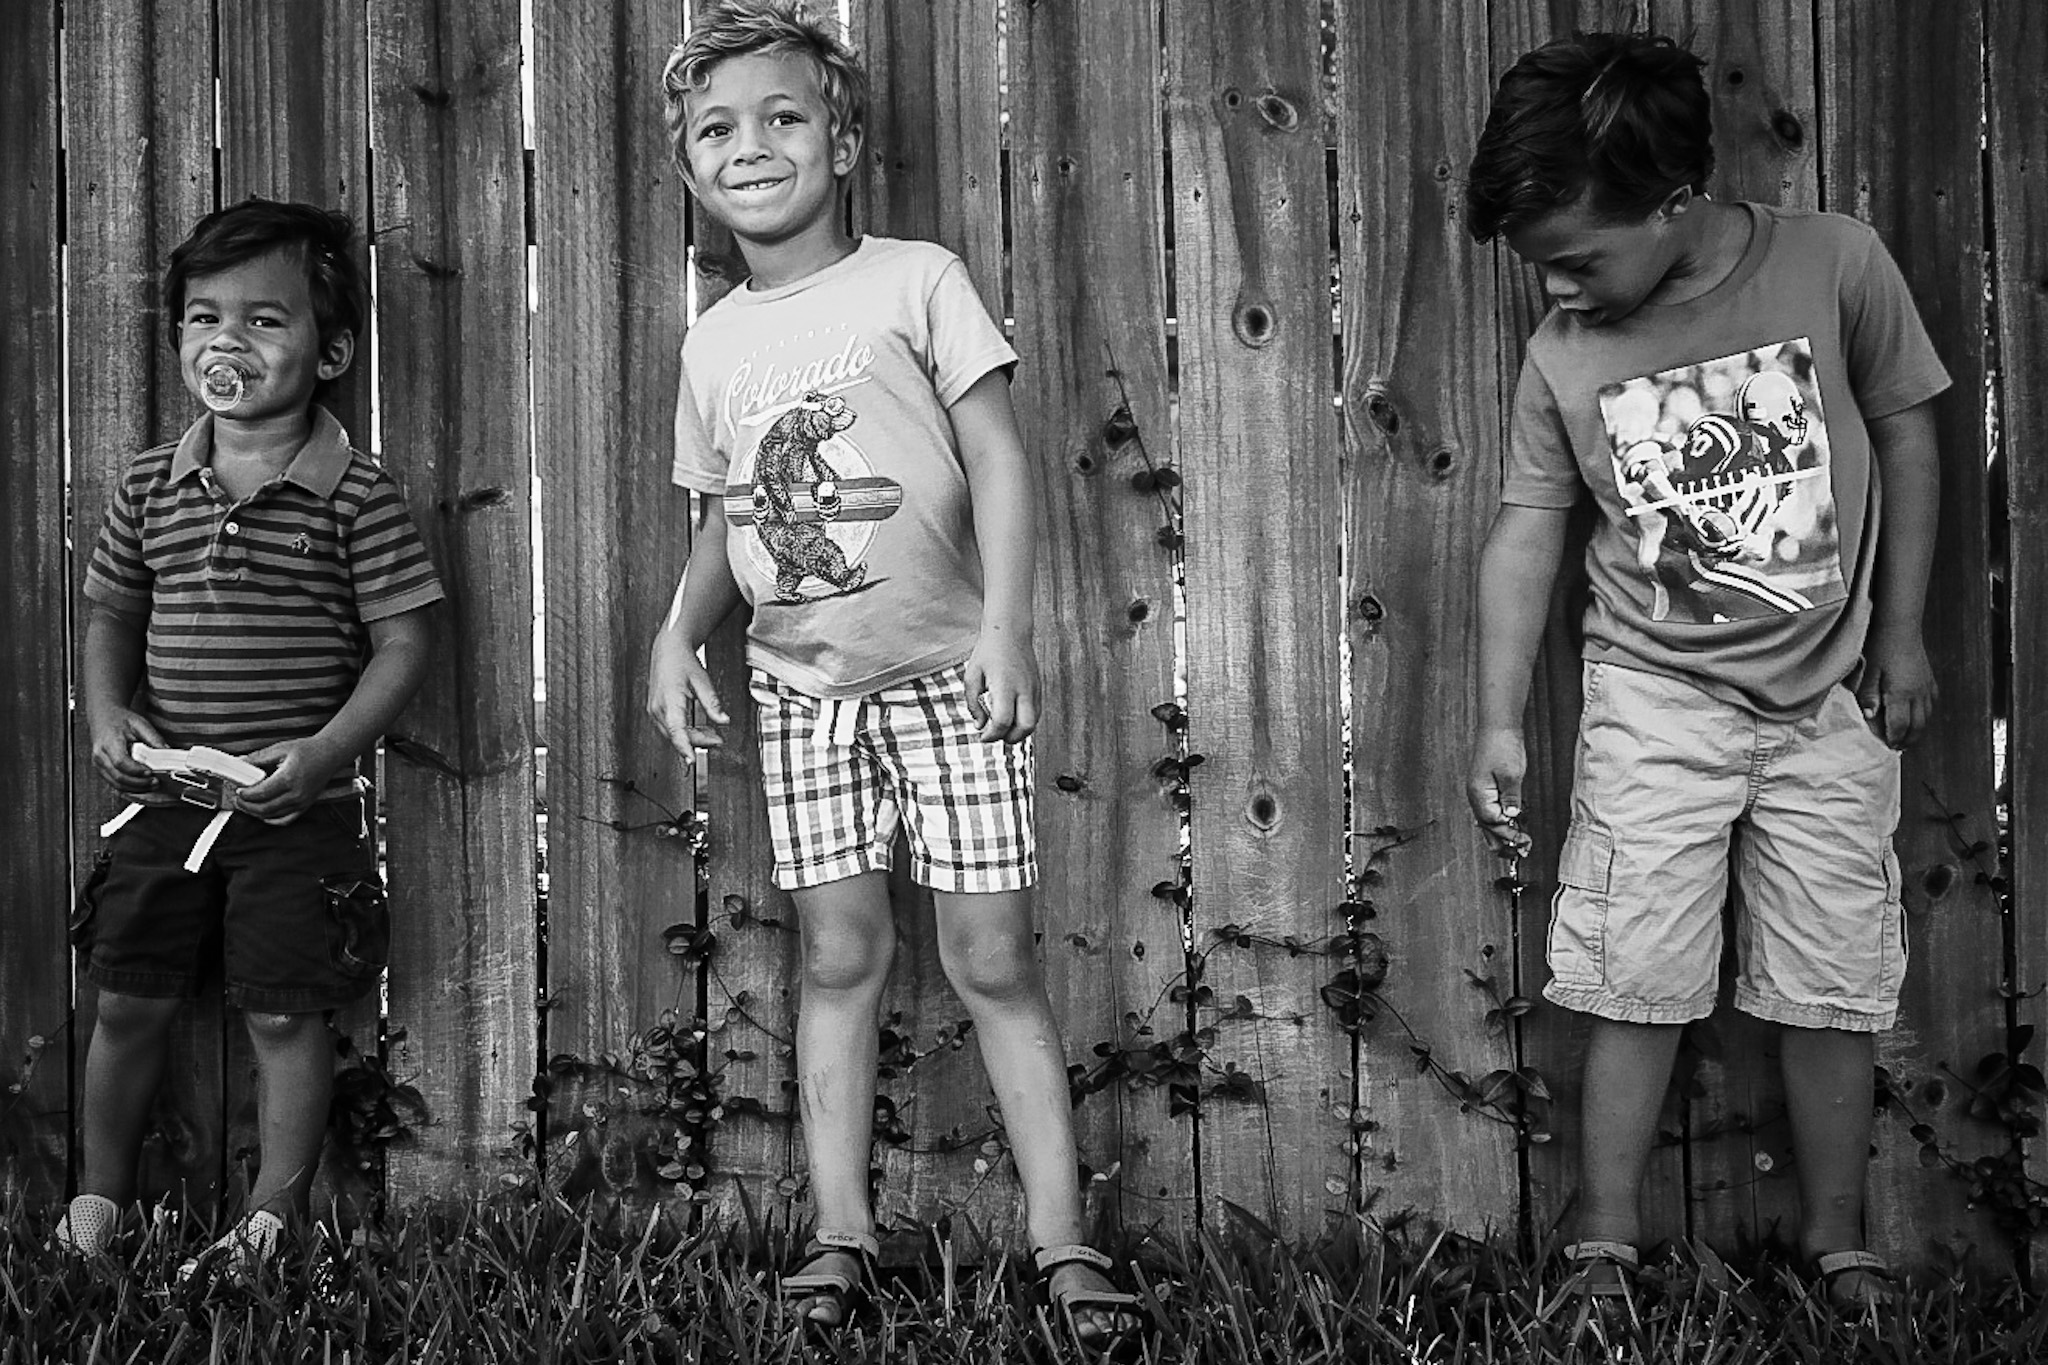
It’s funny, because it’s true. We all know, too well, the pain and suffering that can accompany multi-step, complicated, beyond-your-child’s-capability, art projects. And the viral meltdowns that nearly always ensue across all involved kiddos. Which is why I do a lot of “partially homemade” projects with the kids. They’re cheap, usually easy (although I guess that’s subjective), and they absolutely have to be something each child can partake in regardless of ability. So without further adieu, two quick and inexpensive 4th of July crafts that I found relatively easy to do with my boys…and the meltdowns were minimal.
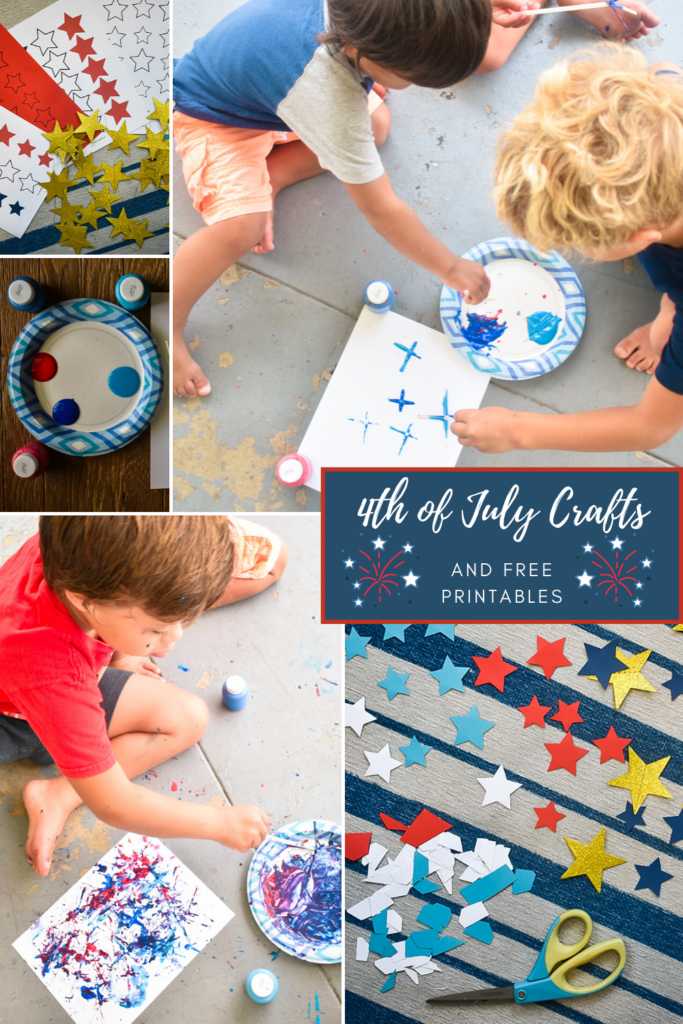
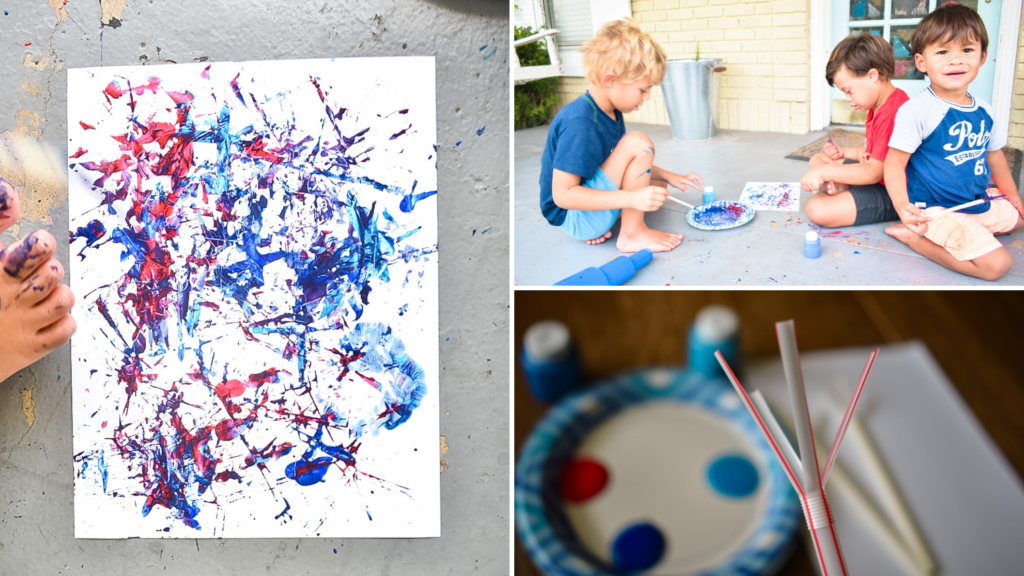
Project 1 – Fireworks Paint/Photo Craft
Supplies:
- A frame that holds a 4×6 photo with some extra room around the sides, like this one from Amazon
- 4×6 photo paper
- 1 piece of white cardstock paper
- 1 small plate
- Washable paint
- Straws (flexible with stripes, preferably)
Steps:
- Purchase a frame similar to the one referenced above. Get one that ships in 1 day in case you’re in a time bind (which I always am, #lastminutemom).
- Find or take a cute photo of your kid(s) and print it out WITH a border on the 4×6 photo paper. I personally like glossy photo paper, I think it prints out better on home printers. Cut off the borders and put print aside and save for Step #7.
- Take 2 or 3 straws (1 straw for each color of paint) and cut the end into four strips. I prefer striped bendy straws, and I just cut along the lines up to the bendy part. Bend the cut pieces back so that it resembles a flower.
- Pour paint into a flat dish.
- Show your kid(s) how to dip the straw “petals” into the paint and let them start stamping the piece of card stock paper with different bursts of color!
- Let the paint dry. If you want to make this a progressive project, have each kid pick a color and take turns stamping after the previous child’s paint dries. If you use this method, it’s important to let the paint dry fully between each stamping session or the colors will mix, and you won’t have that cool layered effect. But…mixed colors look cool too. Either way, I have personally found that progressive projects like this can be easier and they allow you to focus on one kid at a time, minimizing the turf battles that group art projects bring about. Just my two cents and experience…
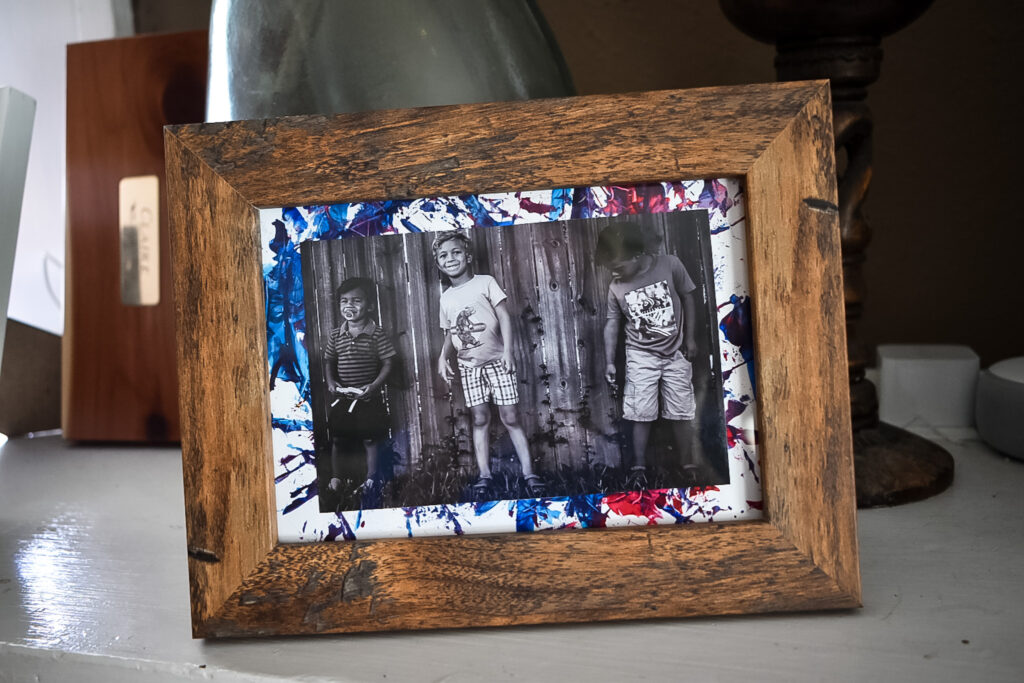
- Once your “masterpiece” is finished and completely dry, cut it down to size to become the 5×7 backing in your frame.
- Place or stick the trimmed 4X6 photo onto the paint-stamped card stock.
- Load it into your frame….and you’re done!
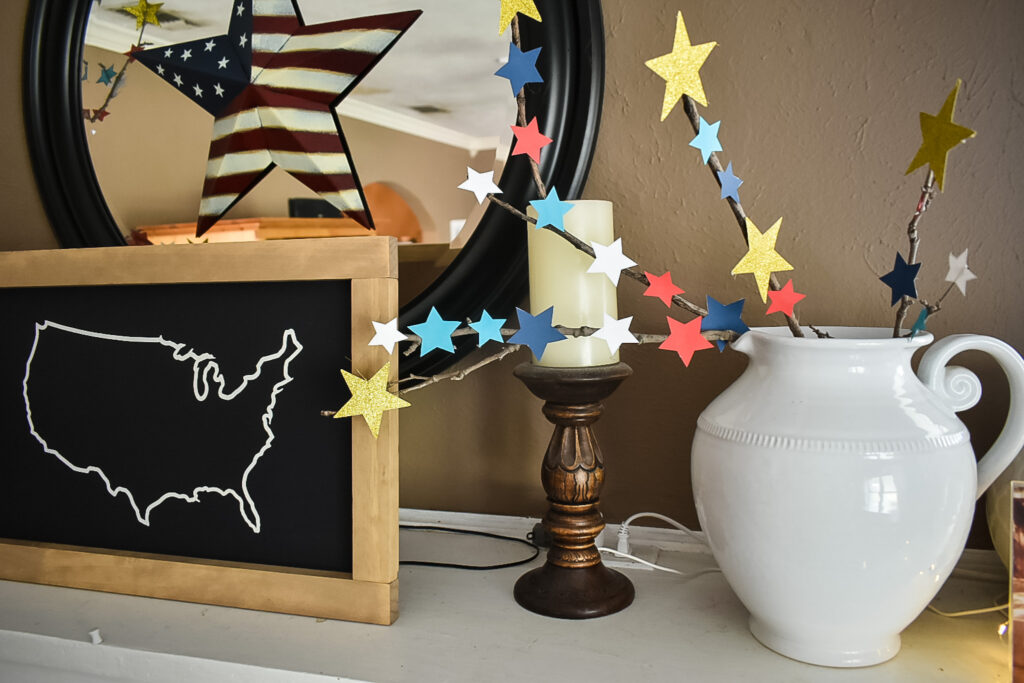
And if you’re feeling EXTRA crafty, check out the FREE PRINTABLES below and cut out some stars with your kiddo(s) – we had a lot of fun cutting and taping these stars onto some branches we found on a morning walk.
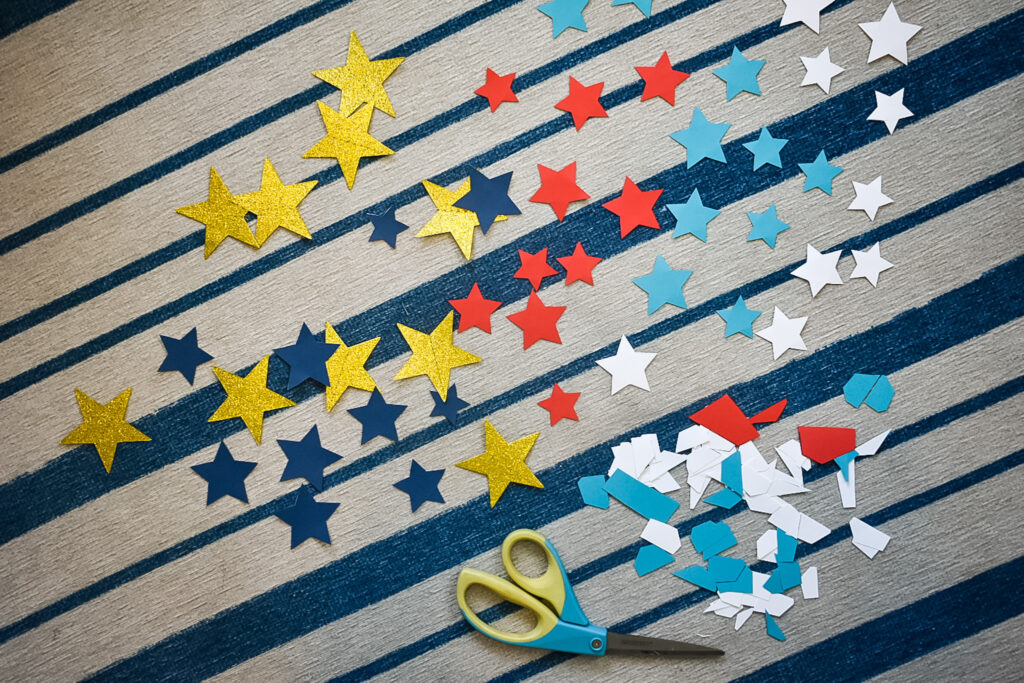
Project 2 – Cutout Stars Craft
Supplies:
- 4th of July Free Printables
- White cardstock paper
- Red and blue construction paper
- Gold star garland (these are great for events, crafts, etc.)
- Scissors**
- Tape or hot glue*
- Stray branches
Steps:
- Click on the free printables above and print out! If you don’t have any construction paper, you can print out red, white, and blue stars on white cardstock or printer paper (I think cardstock works better for printables). Or, you can print the black and white stars out on any color paper (e.g. red and blue). I did a little of both.
- Cut out the paper stars (I cut out 10 navy stars, 10 white stars, 10 red stars, and 10 turquoise stars). This is a great activity for older kids working on their scissor skills, but I have littles so I cut them out myself.
- Cut gold stars off of banner (I cut off 10)
- Start randomly taping or gluing stars to different twigs along your stray branches! (*Update, we used double-sided tape and the stars later fell off…I eventually used hot glue and that did the trick. If your kids aren’t old enough for hot glue, do this step by yourself).
- Place in vase in your chosen location.
- **After finishing this craft, I determined it’s probably better suited to older kids. All the cutting, taping, and hot-gluing was too much for my little guys.
I think it all turned out really cute though, and it looks perfect on our newly decorated 4th of July mantle! And honestly, the hardest part of this art project was taking 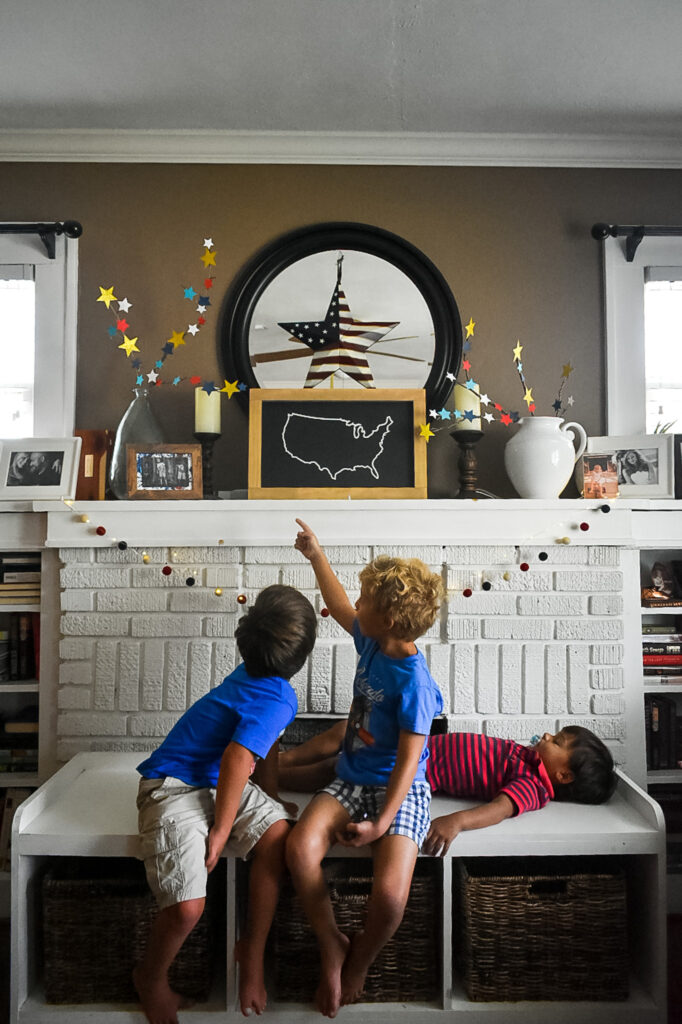 photos for this blog entry. So while I can’t promise you there won’t be ANY meltdowns (that is definitely kid-specific), I can promise you these are two relatively quick and cheap crafts…thus minimizing the time you have to endure any emergent scream-fests and the money you spend on it. Happy 4th everyone!